How Can We Help?
Virtual visit interface update
To improve VirtualCare’s user experience, we have upgraded the Virtual Visit interface to a new teleconferencing system. This new update will see improved video call quality, in-call screen sharing, simplified control buttons, the ability to add unregistered participants, and note templates.
Previously, there was no way to troubleshoot your camera or microphone before joining a call. Now, when you join a Virtual Visit, a Join call? screen will display (similar to a Google Hangouts meeting), where you can test your camera, microphone and speaker before joining.
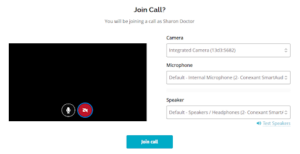
Once you have confirmed that everything is working correctly, you will now click Join Call to officially join the visit.
Previously, joining a call would open in the same internet browser tab. However, with the update, clicking Join Call will now open the video or audio call in a new tab.
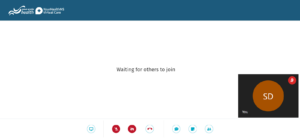
From here, you can carry out your Virtual Visit as you normally would in the new window. You can close the window at any time to end the call. You can click the microphone icon to mute yourself, or the video icon to shut off your camera.

If you are a provider, at the far right, there is a new Take notes icon.

Clicking the note icon will open up a panel on the right-hand of the screen that displays the visit’s details and the ability to add visit notes that the patient may not see.
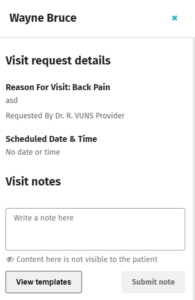
Note: Only a provider may access the notes section.
Note templates
To streamline the documentation process, we have added the ability for clinical users to create custom templates for a visit’s Visit notes.
On the visit details page, clicking View templates > Add new will allow you to create a new template. This can also be completed during a visit.
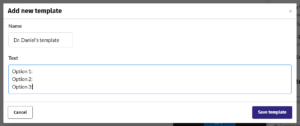
You can enter a unique name and text that will appear in the Visit notes section if selected.
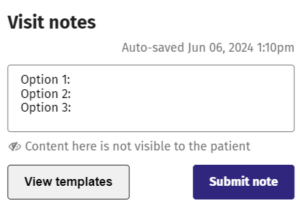
Note: Only a provider may access the notes section.
Providers will also have the ability to add a note to the visit for the patient to review.
Clicking the Chat icon will open up a text area where the provider and patient will be able to send messages back and forth, and send attachments.
Providers also have the new ability to share their screen with their patients. To do so, click the screen share icon at the bottom of the screen, beside the microphone icon. A You are sharing your screen banner will display in the bottom of your screen and your patient will be able to see what you would like to share with them. Click the screen share icon again to end your screen share.
Add participants
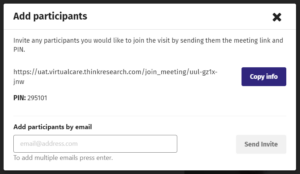
Providers also have the ability to add unregistered participants to a virtual visit. This is especially useful for patients who would like to have family members or caregivers on the call with them for support.
To add a participant, in the Participants window, click + Add participants. You can copy the link to the visit and send it to the participant directly, or you may enter their email and send them the information through the application.
When the call is complete, you can click the phone icon to “hang up” and end the Virtual Visit. You will then be directed to a You left the call screen. Closing this screen will return you to the Visit’s details page.
